1. Dashboard Overview
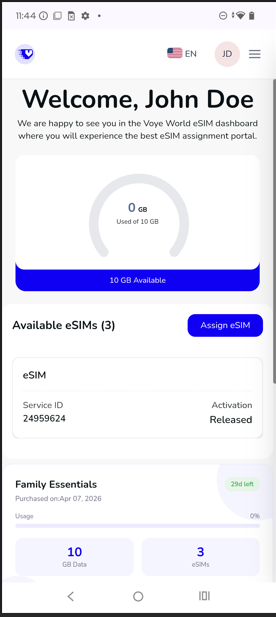
When you log in to your Voye Data Pool Family Plan account, you land on the Dashboard. This is the central hub from which you can monitor your data usage, manage family members, assign eSIMs, and access all key features of the platform.
- Data usage gauge — shows GB used vs. total pool available
- Available eSIMs — count with an Assign eSIM quick-action button
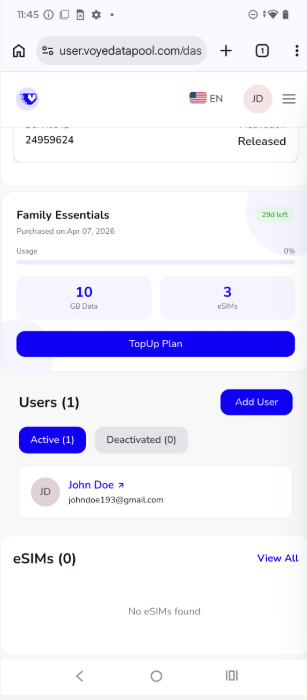
- Family Essentials plan card — plan name, GB data, eSIM count, days remaining and usage
- TopUp Plan — button to top up your current plan
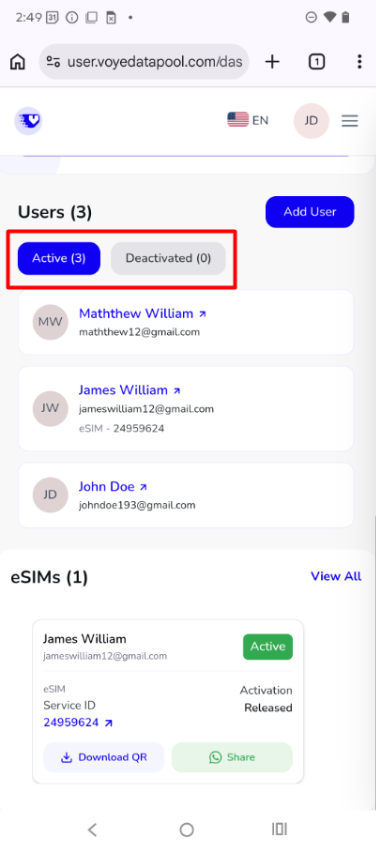
- Users section — lists all family members with Active / Deactivated tabs and an Add User button
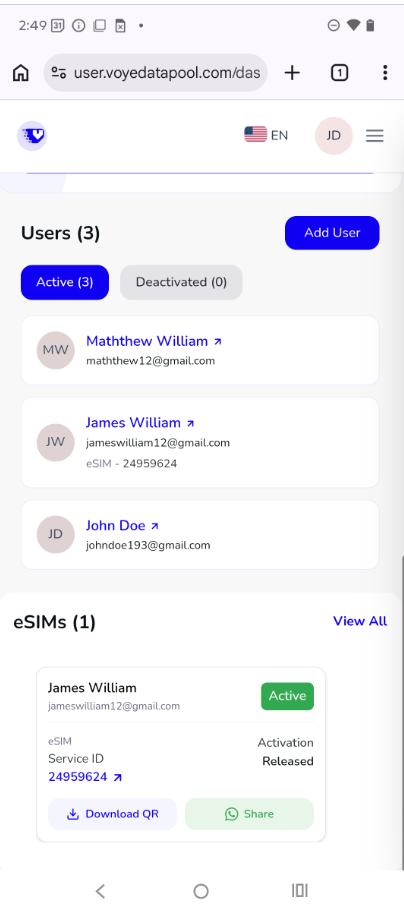
- eSIMs section — shows allocated eSIMs with QR download and WhatsApp Share options
2. User Management — Add & Manage Users
The Users section on the Dashboard lets you add new family members to your plan, view existing members, and manage their details.
Add New User
- Go to the Users section.
- Click the Add User button in the top-right corner of the Users section.
- Fill in the Add New User form: First Name and Last Name, Email Address, Phone Number (with country code), Country. Optionally check "Assign eSIM to this user" to immediately allocate an eSIM.
- Click Add User to save. The new user will appear in the Active users list.
Note: The new user will receive an email with their login credentials to access the Voyedatapool.
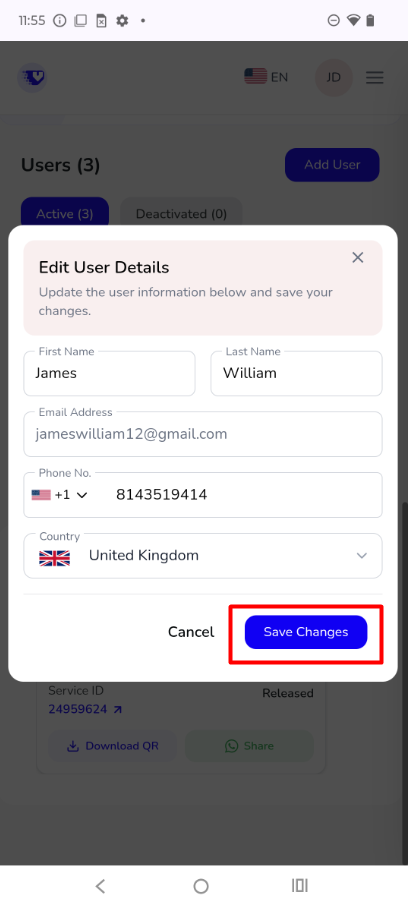
Edit User Details
To update an existing family member's information, open their User Details and tap the pencil icon. The Edit User Details modal allows you to update: First Name and Last Name, Phone Number, Country.
Tap Save Changes to apply the updates.
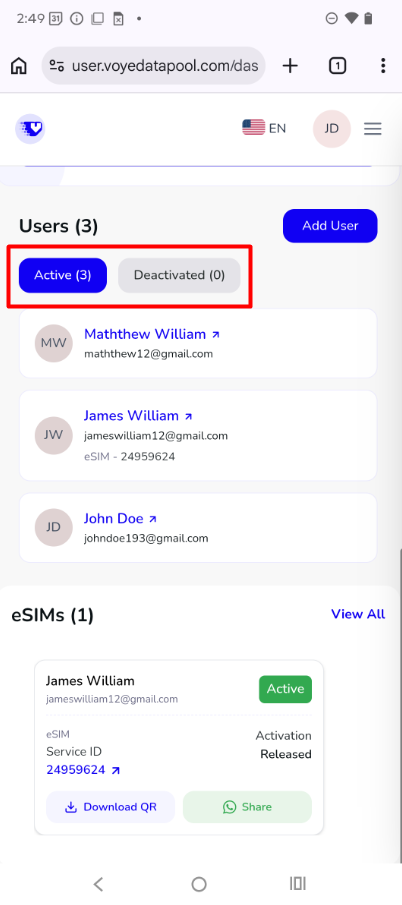
3. Active & Deactivated Users
The Users section on the Dashboard provides two tabs to help you track the status of all family members:
- Active — Shows all currently active family members.
- Deactivated — Shows users who have been deactivated and no longer have access.
Tap either tab to switch between the lists. Each user card shows:
- User avatar / initials
- Full name (tap to open User Details)
- Email address
- eSIM Service ID (if an eSIM is assigned)
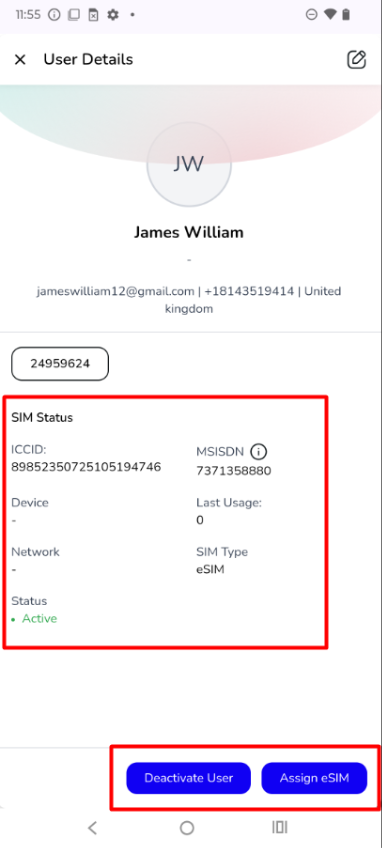
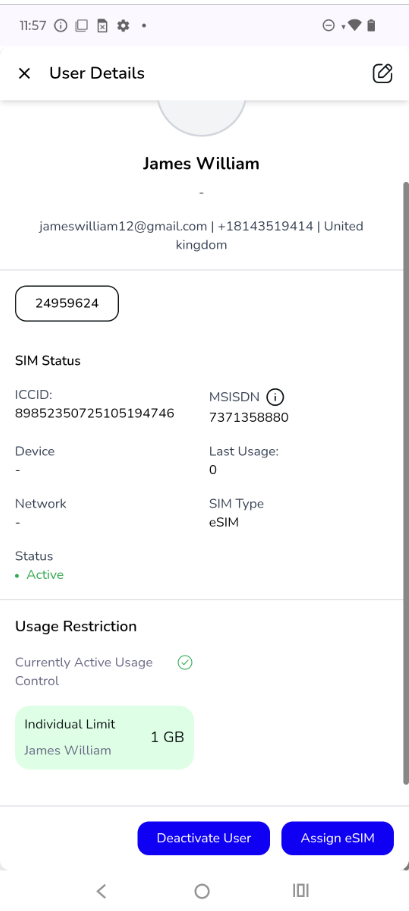
4. User Details
Tapping on a user's name opens the User Details screen. This gives you a complete view of that family member's profile, assigned eSIM, SIM status, and any active data usage restrictions.
Information Displayed
- Profile: Name, email, phone number, country
- Assigned eSIM Service ID
- SIM Status: ICCID, MSISDN, Device, Last Usage, Network, SIM Type, Status (Active / Inactive)
- Usage Restriction: Shows the active data limit assigned to this user (e.g., Individual Limit — 1 GB)
Actions Available from User Details
- Edit — Pencil icon (top-right) to update user information
- Deactivate User — Deactivates the user's access
- Assign eSIM — Assign or re-assign an eSIM to this user
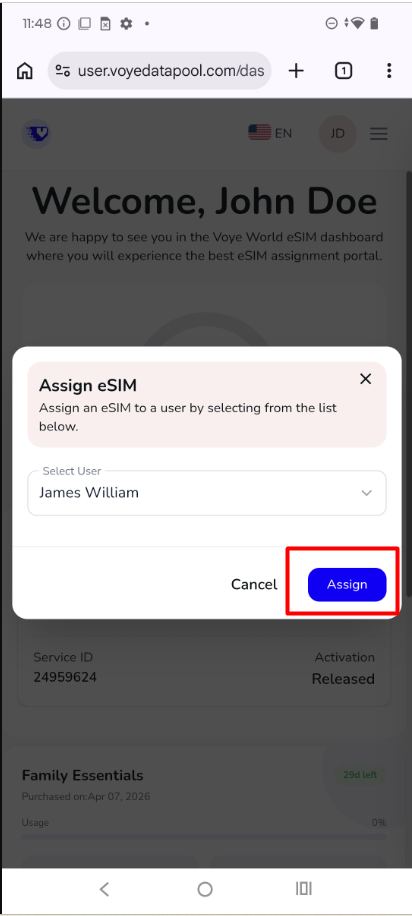
5. Assign eSIM to a User
Once a family member has been created, you can assign one of your available eSIMs to them directly from the Dashboard or from the User Details screen.
Assign eSIM from Dashboard
- Click the Assign eSIM button next to the Available eSIMs count.
- Choose the user from the Select User dropdown.
- Click Assign to confirm. The eSIM will appear in the eSIMs section with the user's name, Service ID, and Activation status.
Note: After assigning, the eSIM card shows a Download QR button and a Share (WhatsApp) button — use these to send the eSIM QR code to the family member so they can install it on their device.
View All eSIMs
Tap View All in the eSIMs section to open the full eSIM list. You can filter by All, Active, or Deactivated status. also
6. Active & Deactivated Users
The Users section on the Dashboard provides two tabs to help you track the status of all family members:
- Active — Shows all currently active family members.
- Deactivated — Shows users who have been deactivated and no longer have access.
Tap either tab to switch between the lists. Each user card shows:
- User avatar / initials
- Full name (tap to open User Details)
- Email address
- eSIM Service ID (if an eSIM is assigned)
7. User Details
Tapping on a user's name opens the User Details screen. This gives you a complete view of that family member's profile, assigned eSIM, SIM status, and any active data usage restrictions.
Information Displayed
- Profile: Name, email, phone number, country
- Assigned eSIM Service ID
- SIM Status: ICCID, MSISDN, Device, Last Usage, Network, SIM Type, Status (Active / Inactive)
- Usage Restriction: Shows the active data limit assigned to this user (e.g., Individual Limit — 1 GB)
Actions Available from User Details
- Edit — Pencil icon (top-right) to update user information
- Deactivate User — Deactivates the user's access
- Assign eSIM — Assign or re-assign an eSIM to this user
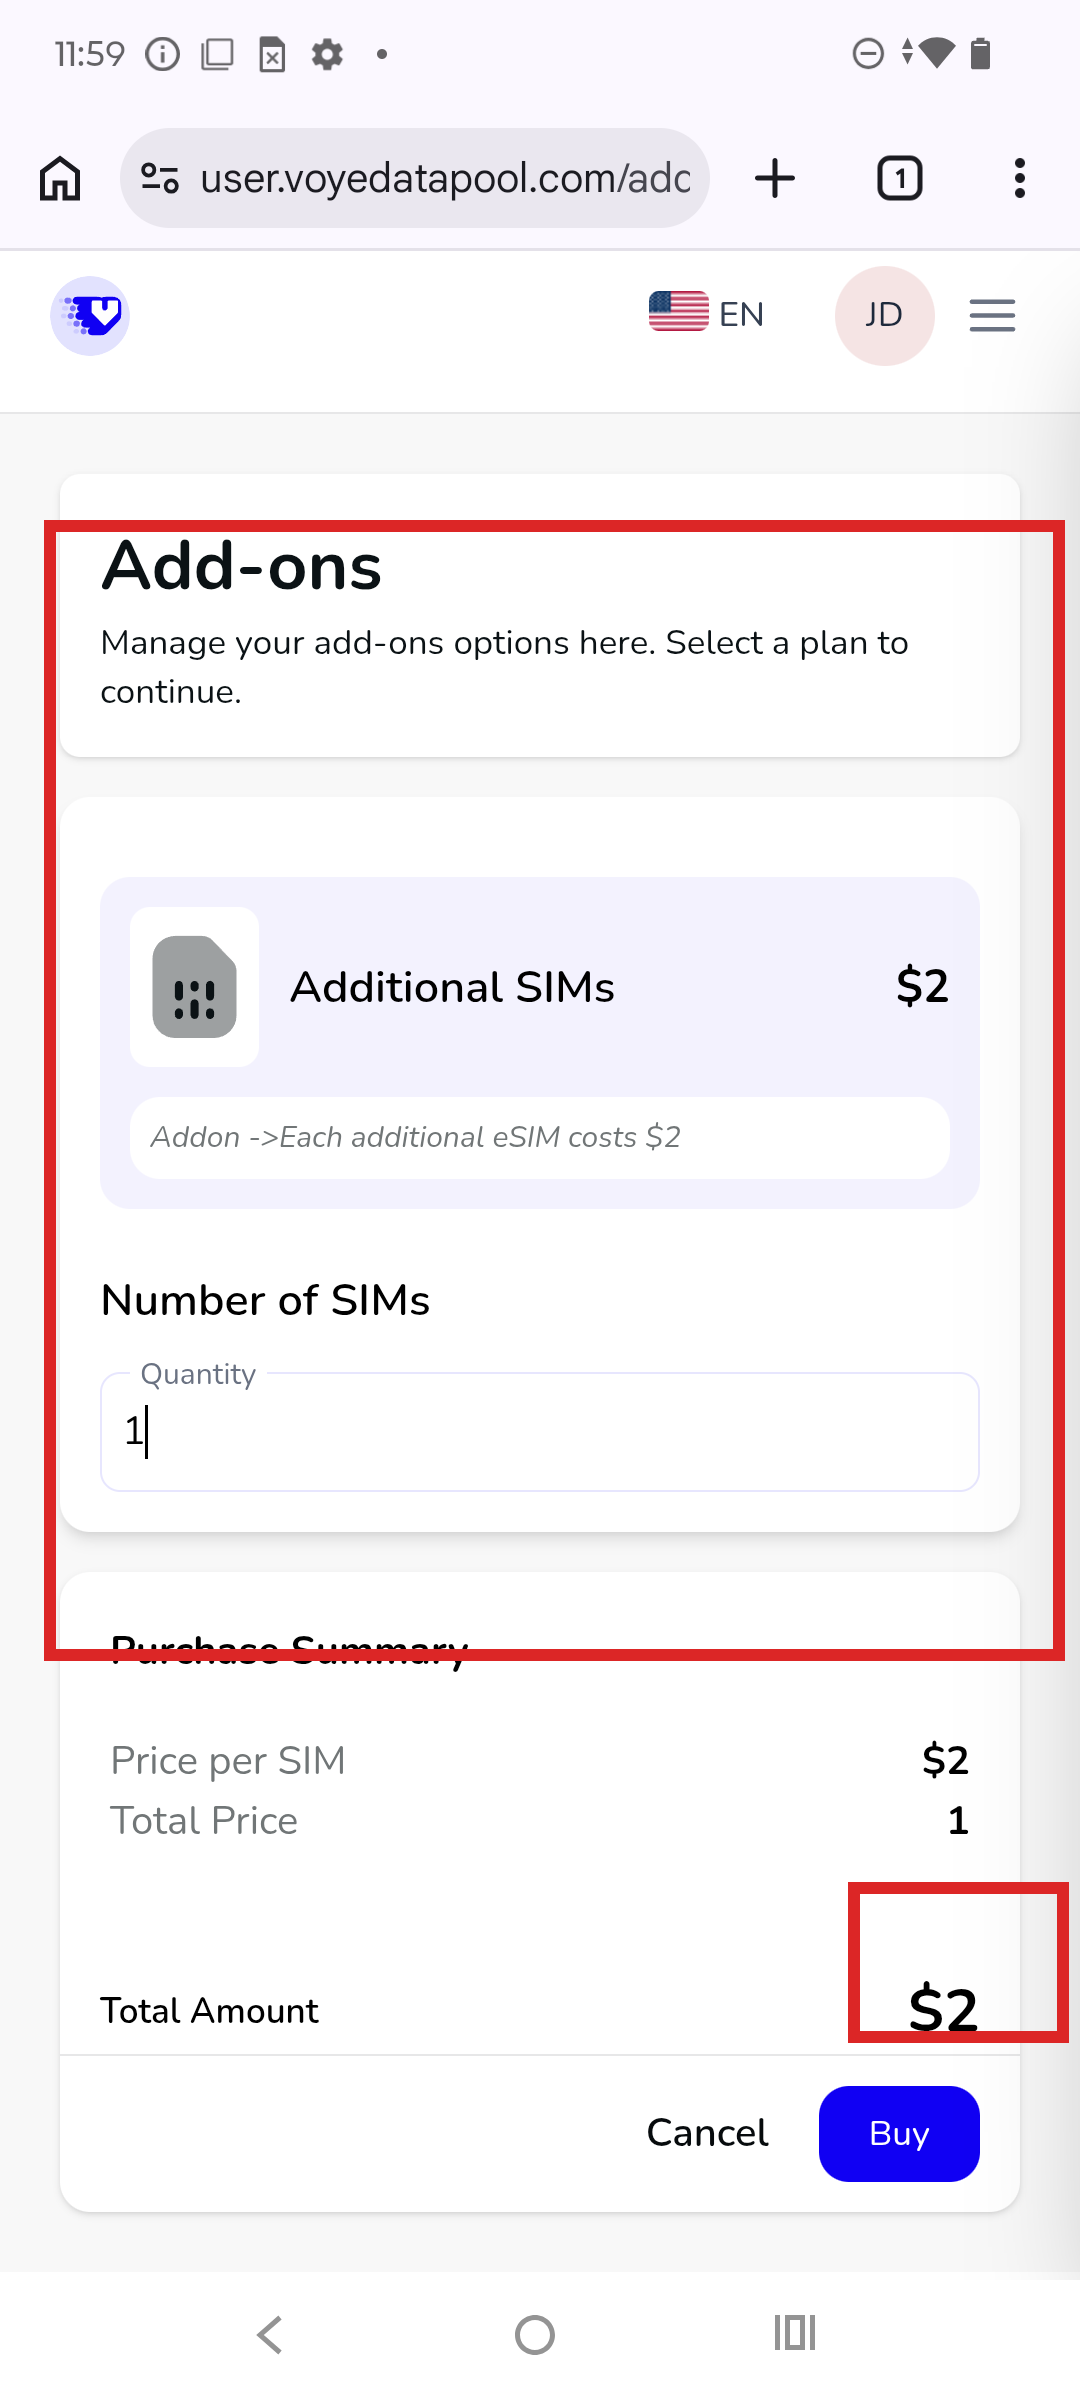
8. Add-ons — Additional eSIMs
If you need more eSIMs than your plan includes, go to the Add-ons section from the navigation menu.
- Select the quantity of additional eSIMs you want to purchase.
- Review the Purchase Summary — each additional eSIM costs $2.
- Click Buy to proceed to the checkout modal.
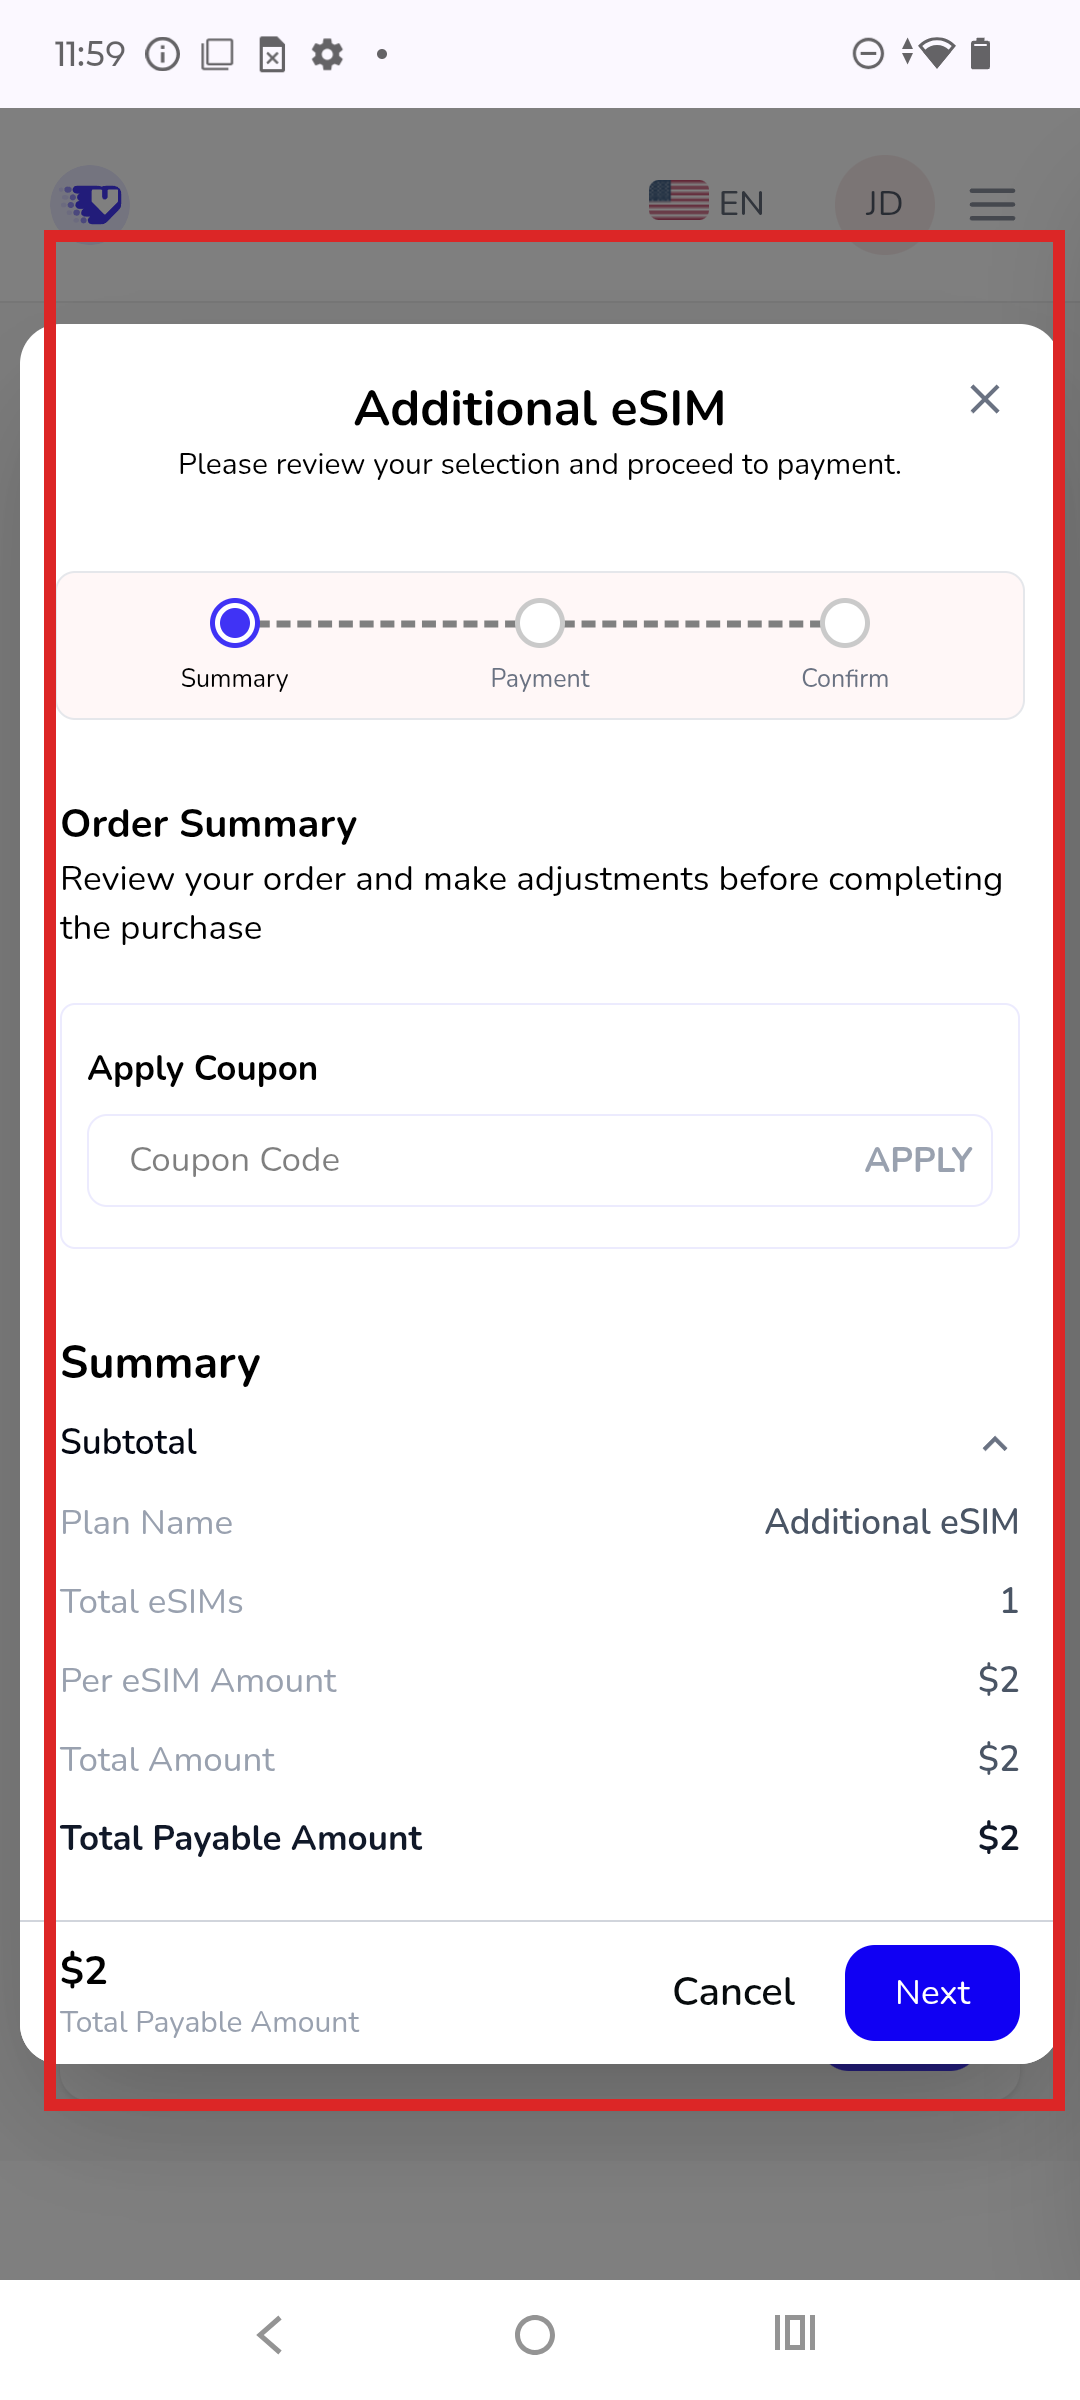
- Review the Order Summary, apply a coupon if available, then click Next → enter payment details → confirm to complete the purchase.
Note: You can only purchase up to the maximum eSIMs allowed under your current plan. After a successful purchase, the add-on eSIMs appear in the Dashboard eSIMs section.
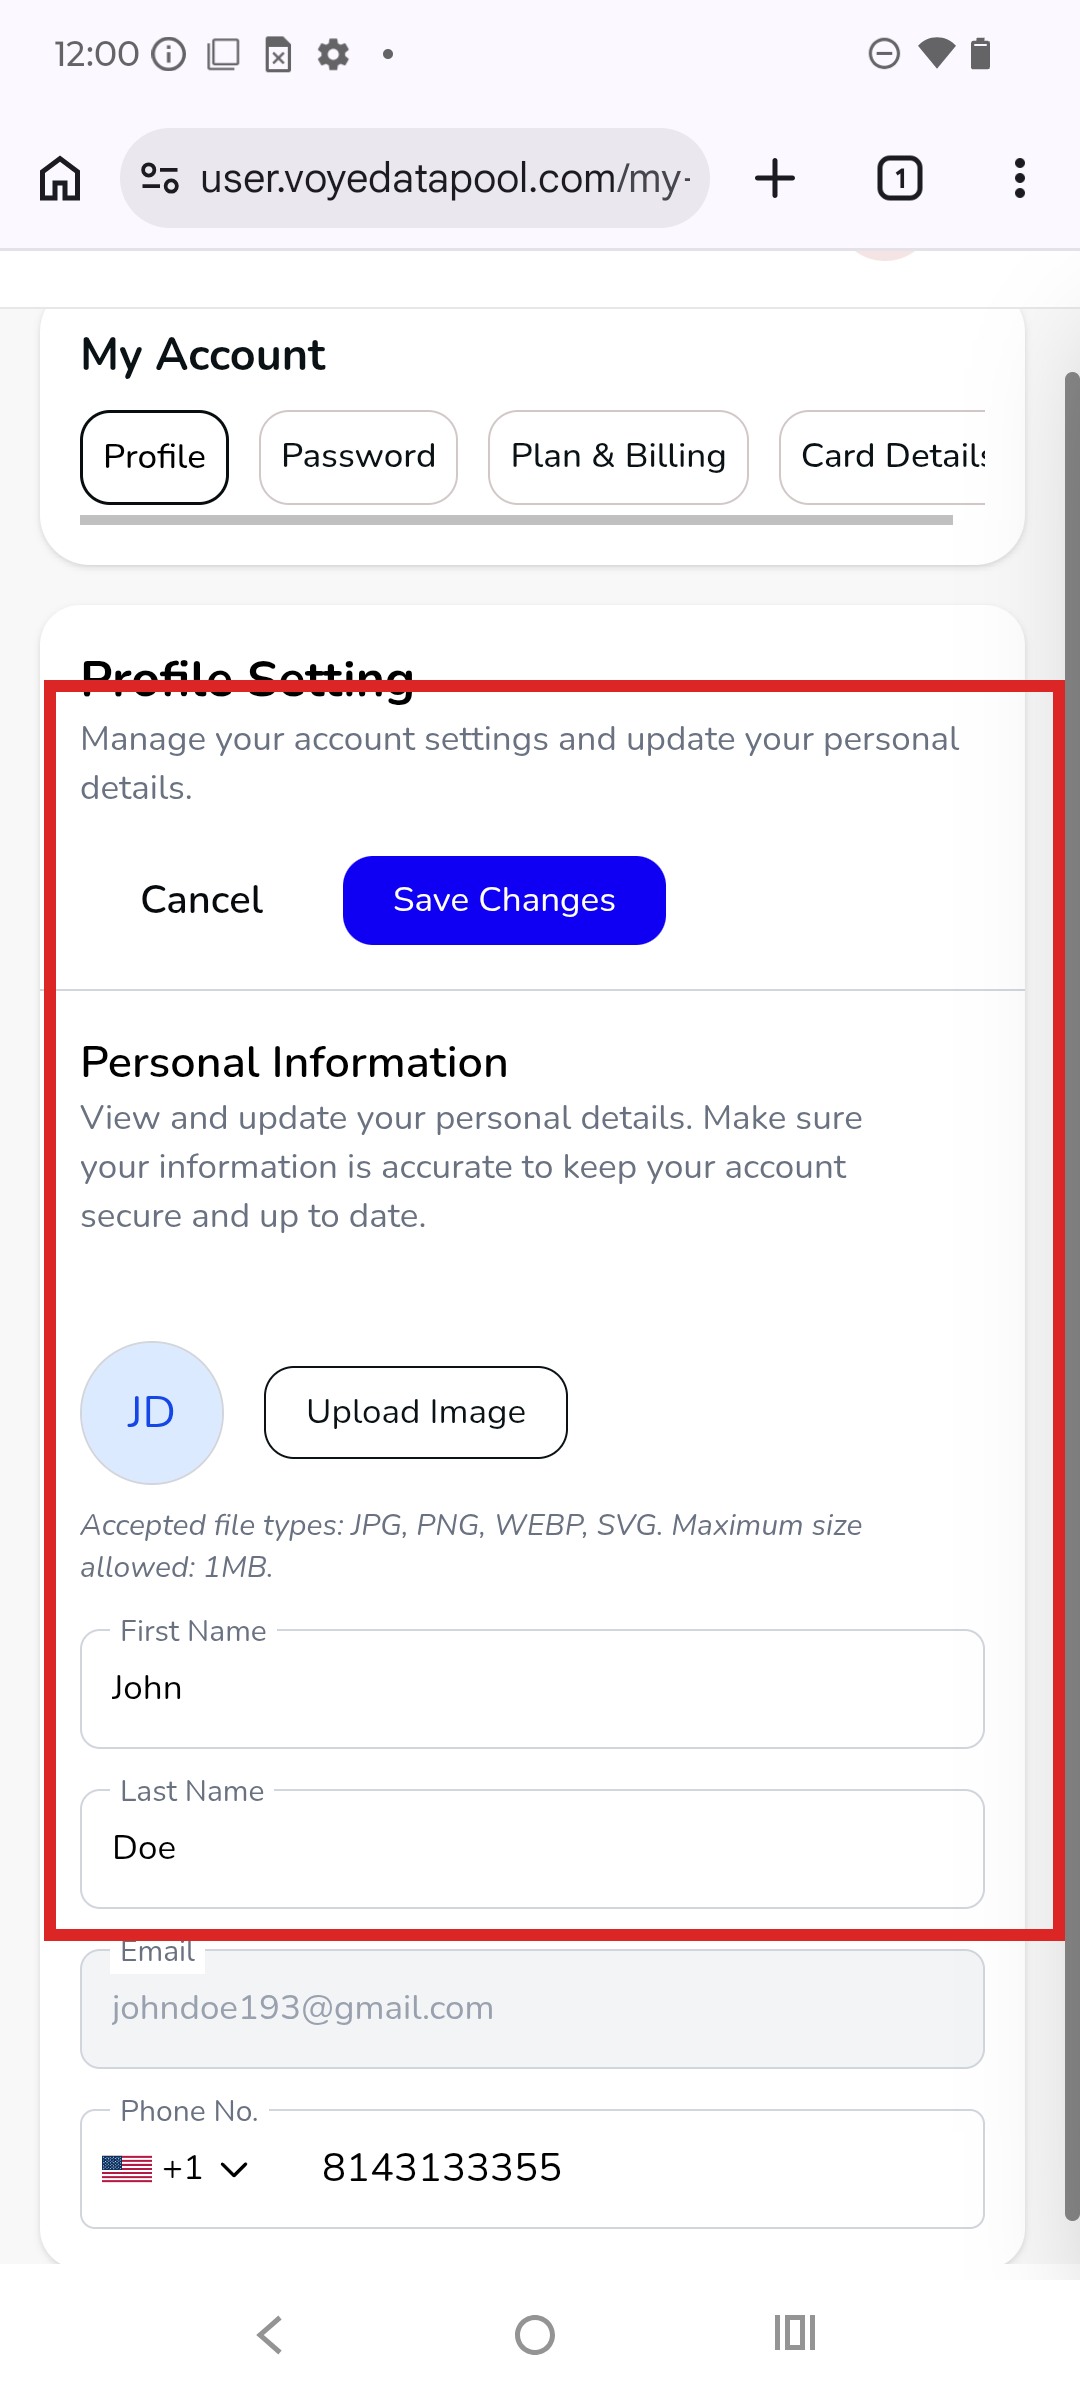
9. My Account
1. Profile Setting
From the Profile tab in My Account you can update your personal information, upload a profile picture, and keep your account details accurate.
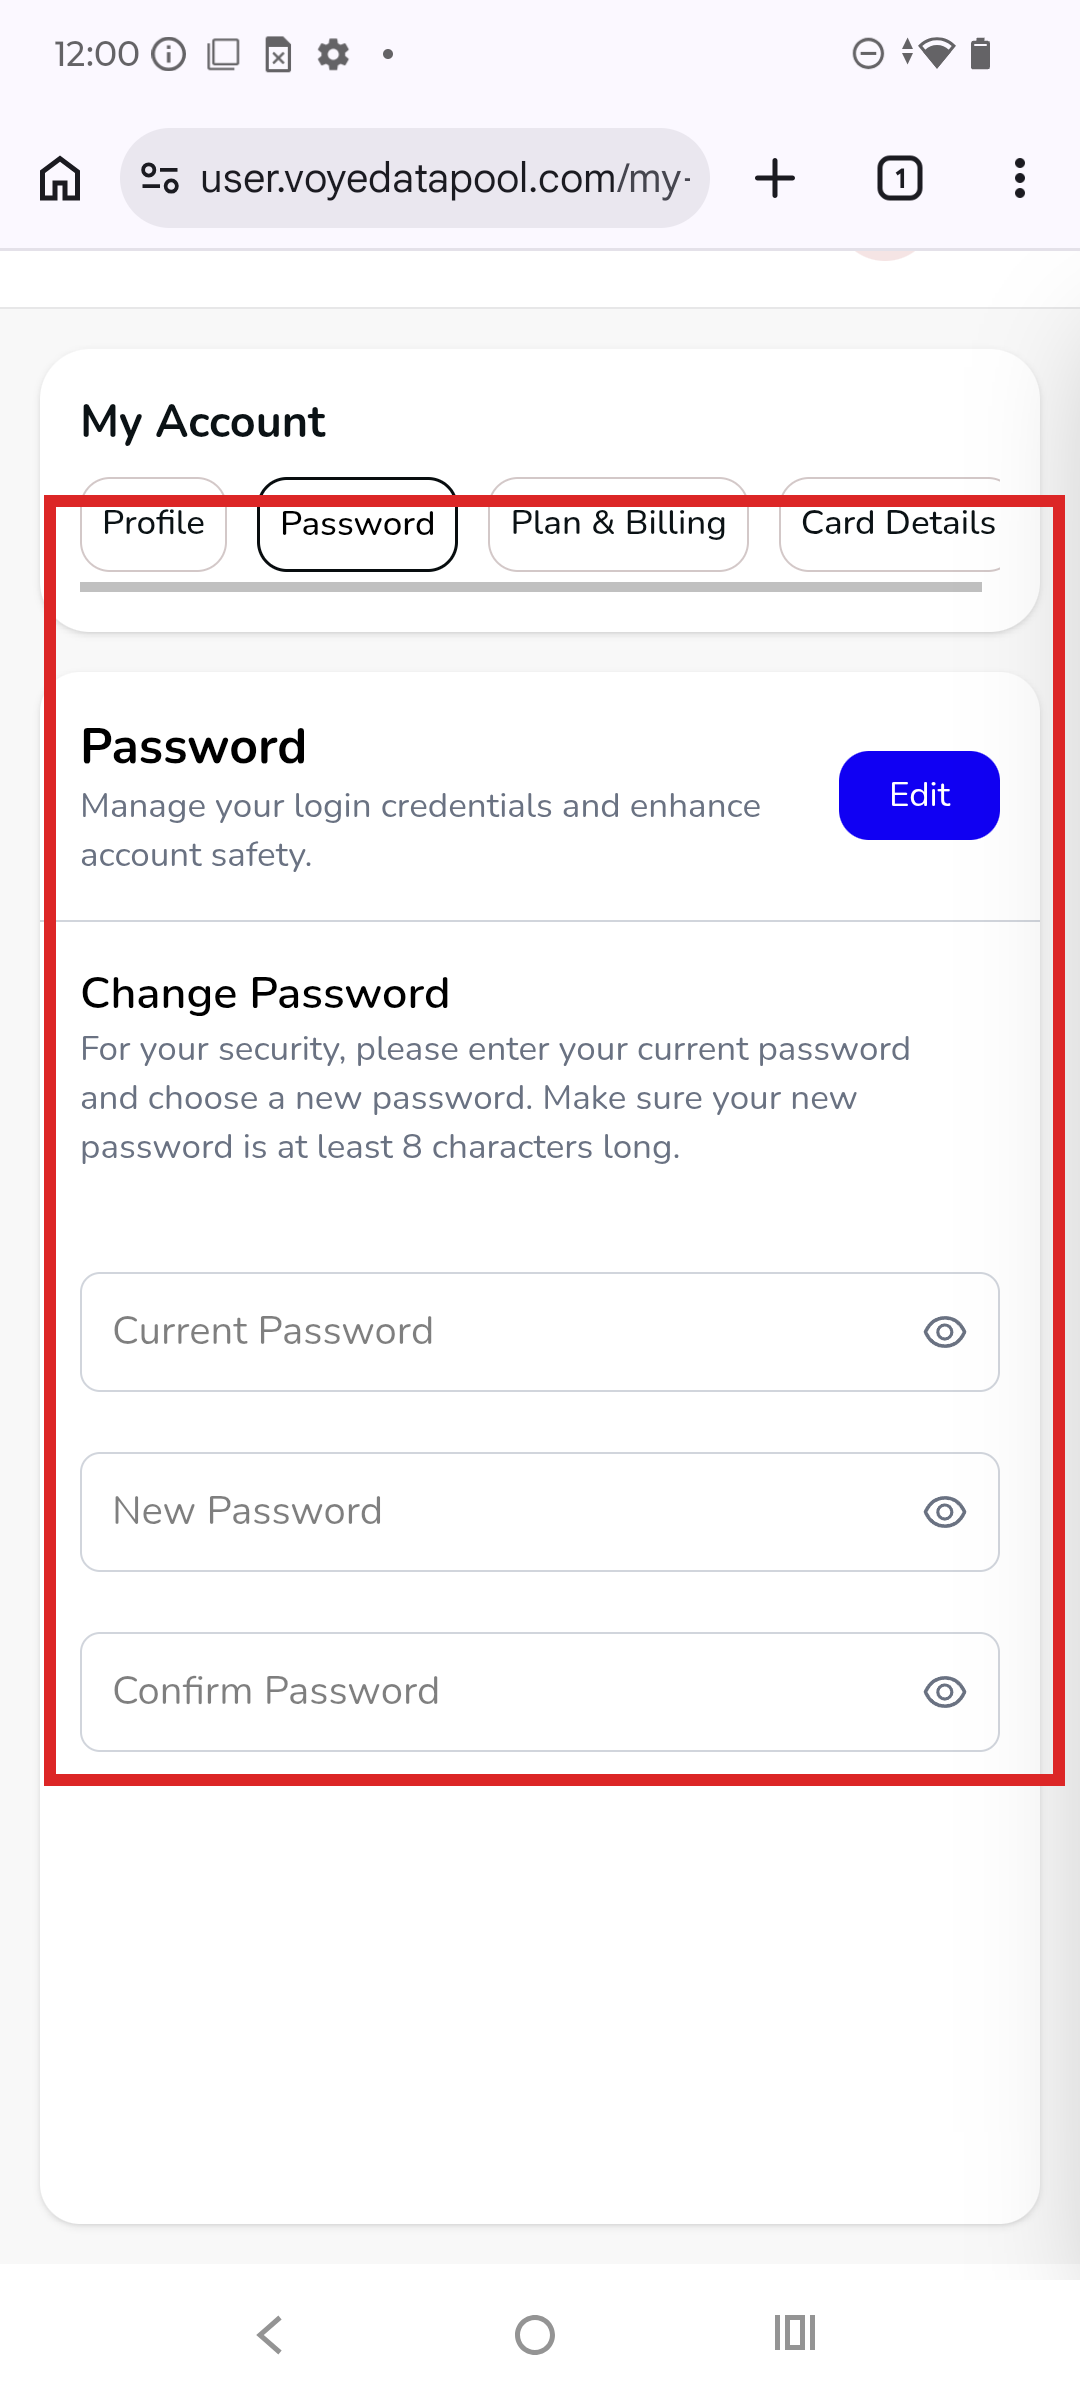
2. Change Password
You can update your account password at any time from the My Account section. Your new password must be at least 8 characters long.
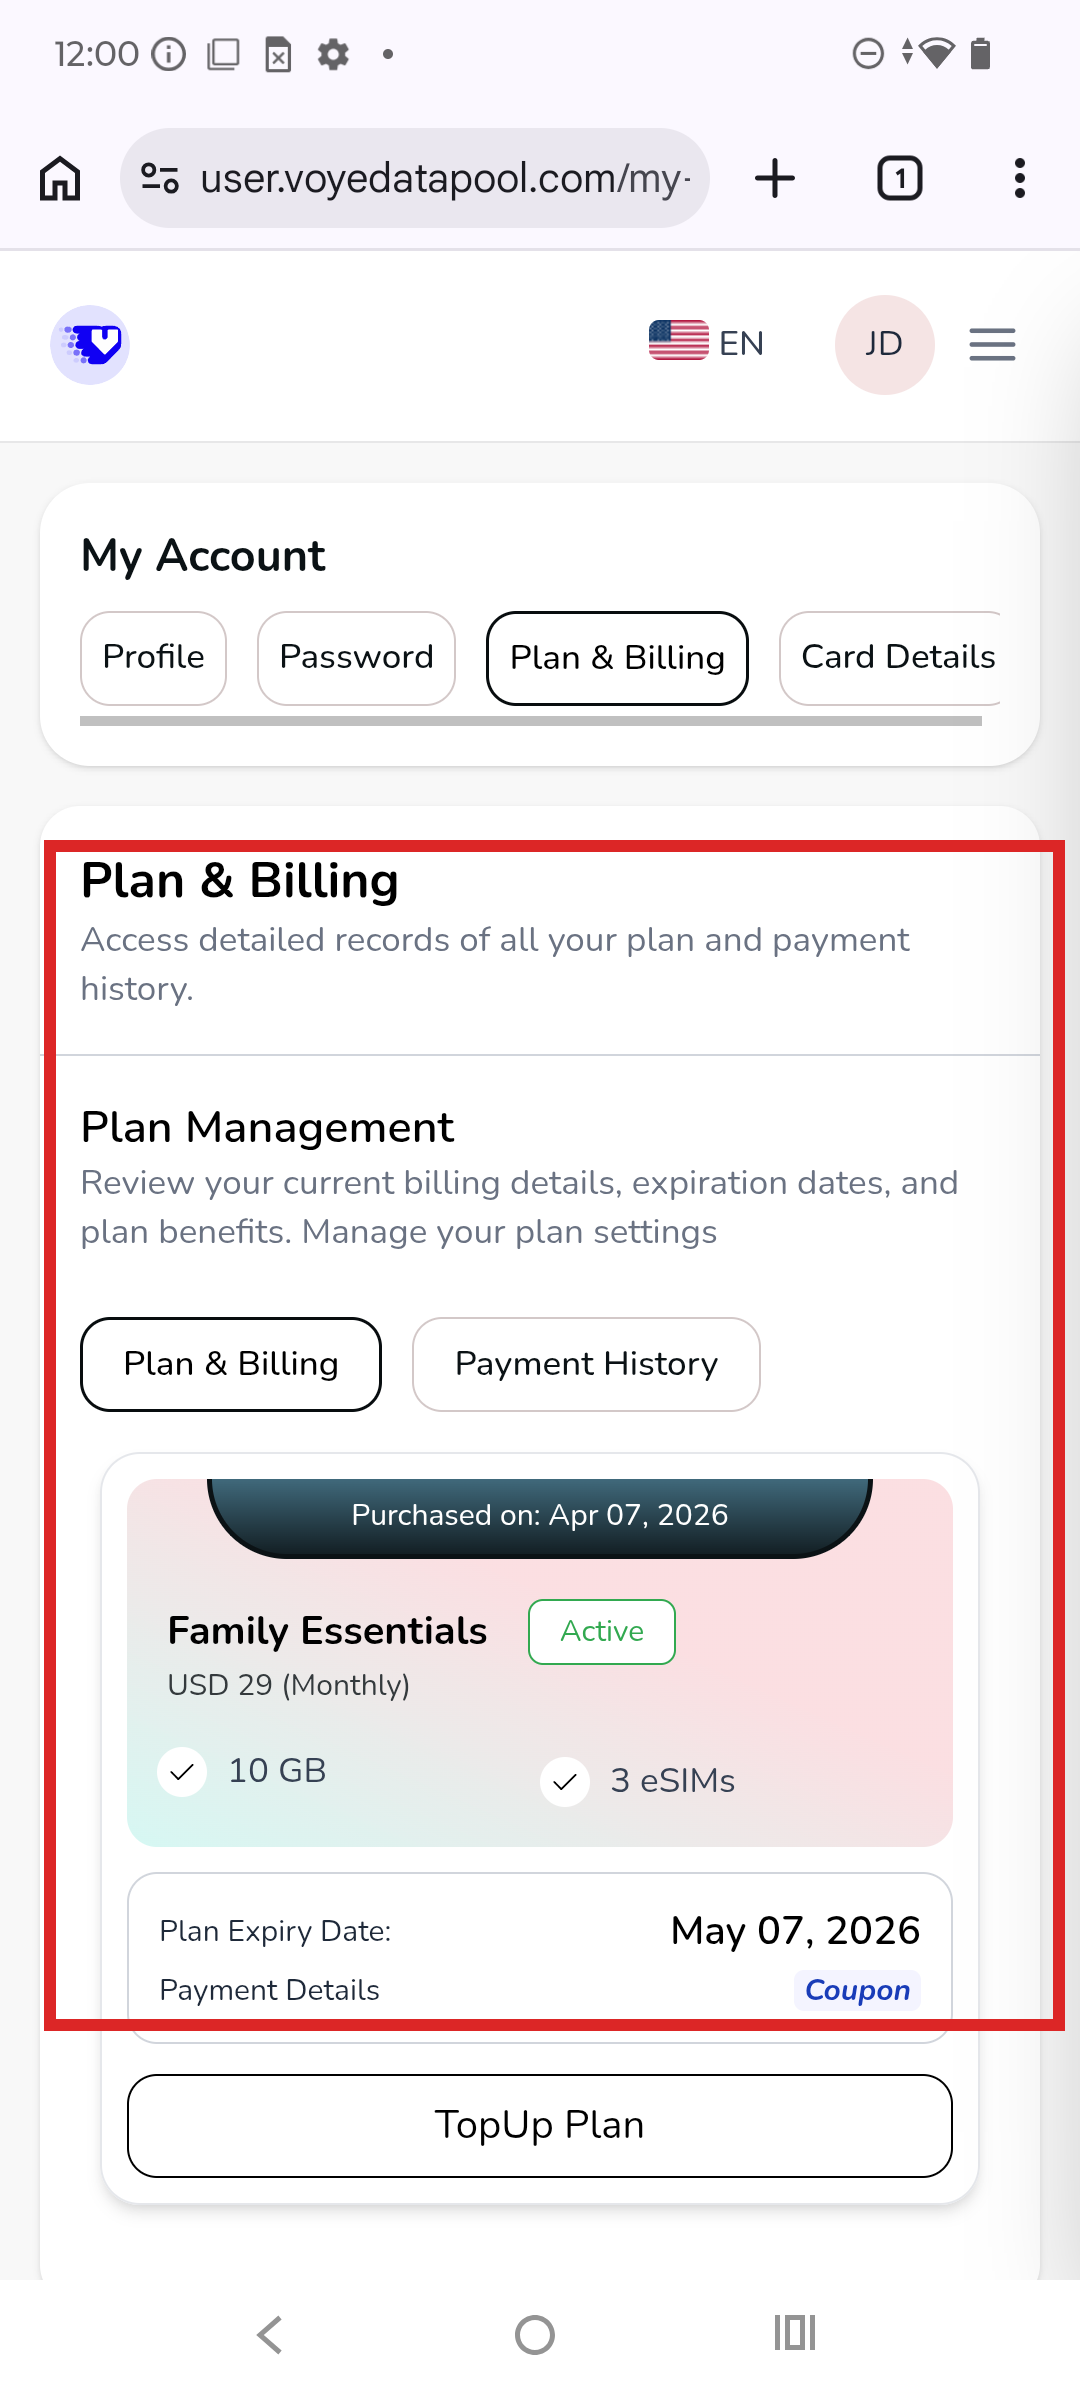
3. Plan & Billing
The Plan & Billing section inside My Account gives you a complete view of your current Family Plan subscription, billing cycle, plan expiry, and payment history. Access Plan & Billing via My Account → Plan & Billing tab. Here you can view:
- Plan Name — e.g., Family Essentials
- Plan Status — Active / Expired
- Billing Amount and Frequency — e.g., USD 29 (Monthly)
- Included Benefits — GB data and number of eSIMs
- Plan Expiry Date
- Payment Details — Purchased details
- Top-Up Plan button — to add more data or extend your plan
- Payment History tab — view all past transactions